Phillips-At-Home Activity: Storytelling and Perspective
Art Activities
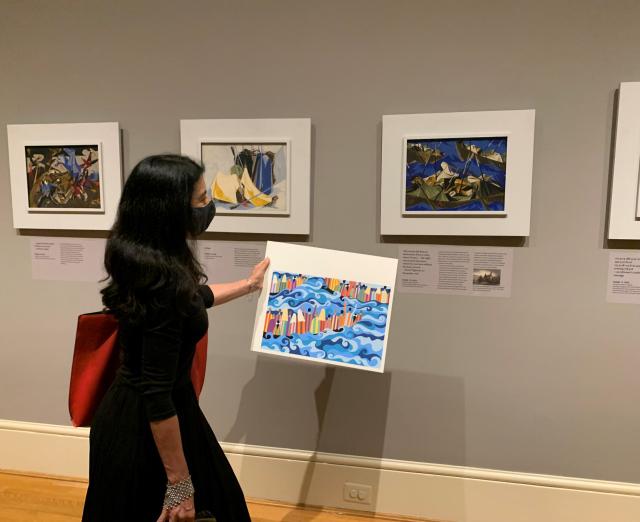
Through this activity, we will take a look at a selection of Jacob Lawrence’s panels from his epic Migration Series and explore the way he tells a story through art.
A series is a group of artworks that work together to tell one story. What connects these paintings to each other, and what makes them a series? Think about the stories Jacob Lawrence is telling and the story you would like to tell.
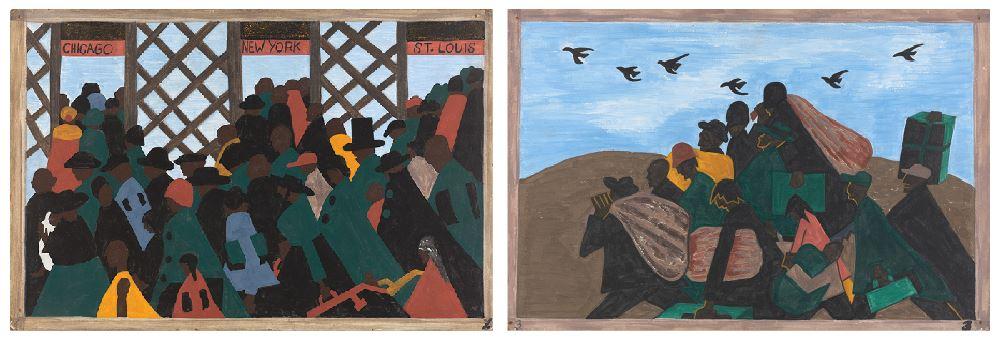
(left) Jacob Lawrence, The Migration Series, Panel no. 1: During World War I there was a great migration north by southern African Americans., 1940-41, Casein tempera on hardboard, 12 x 18 in. Acquired 1942; (right) Jacob Lawrence, The Migration Series, Panel no. 3: From every southern town migrants left by the hundreds to travel north., 1940-41, Casein tempera on hardboard, 12 x 18 in. Acquired 1942; © Both The Jacob and Gwendolyn Knight Lawrence Foundation, Seattle / Artists Rights Society (ARS), New York
Look closely: Think about the stories being told in the panels, both individually and as a whole. Look at the way Lawrence layers objects and people. What do you think he is trying to tell us about home? What kind of stories can you tell about your home through art?
About the artist: Jacob Lawrence was born in September of 1917 in Atlantic City, New Jersey. His family, originally from South Carolina, moved north during the Great Migration, the movement of southern African Americans to northern cities. When he was 13, Lawrence and his family relocated to Harlem, a center of African American culture and community in New York City. It was here, in this environment, that Lawrence received his education. Lawrence’s work was largely inspired by the people and places he saw in his very own neighborhood. The Migration Series tells the story of the hardships faced by African American families who traveled from their homes in the south all the way to the cities of the north. The series was first displayed as “a solo show at the Downtown Gallery in Manhattan in 1941, making Lawrence the first black artist represented by a New York gallery.” The series has a total of 60 paintings, which have been split between The Phillips Collection and the Museum of Modern Art in New York.
materials
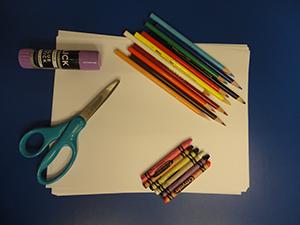
What you need for this activity: Colored Pencils, markers, or whatever you like to use for drawing Plain white paper (more than one sheet) Scissors Glue Stick Your unique home or neighborhood
Age suggestion: 7 and up
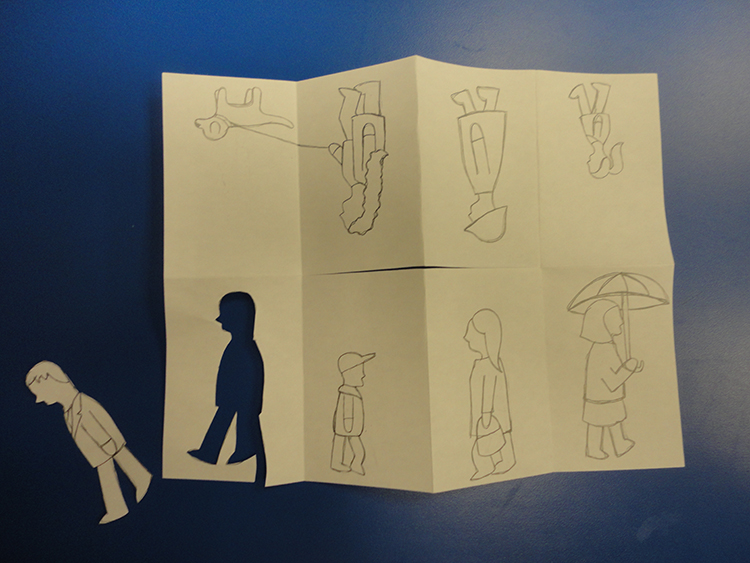
Steps Option 1: Draw the things you know are in your home and/or neighborhood on a piece of paper. You will be cutting these drawings out and rearranging them, so keep them small; try to fit at least 8 drawings on a single piece of paper. If you choose this option you can skip to step 5.
Option 2: Make yourself a small sketchbook so you can go outside and draw the things you see!
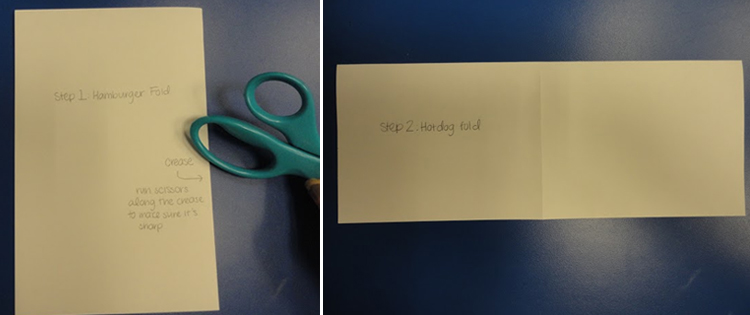
Step 1: Fold your blank piece of paper in half, hamburger-style. To help make sure you have a good crease, try running the handle of your scissors along the fold. Then, unfold your paper and fold it in half again, hot dog style. When you unfold your paper, you should see four boxes.
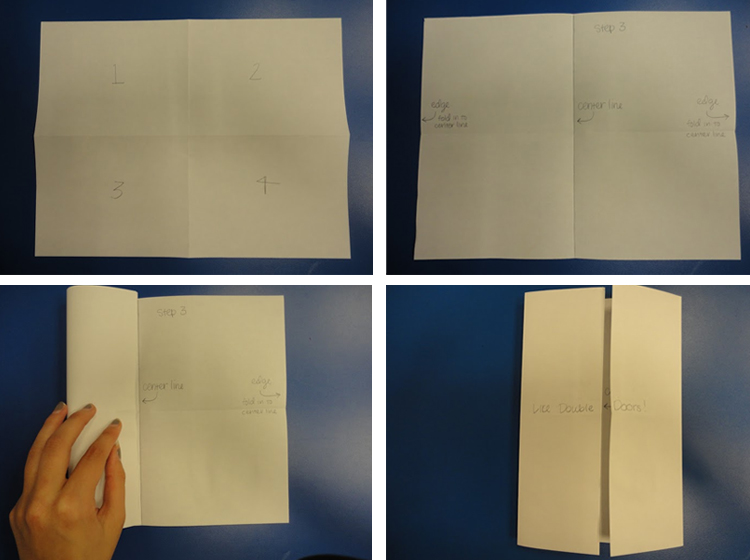
Step 2: Lay your paper flat on the table so that the longer side is facing you. Next, fold each edge in towards the center like double doors. When you’re done with this and you unfold your paper, there should be 8 boxes.
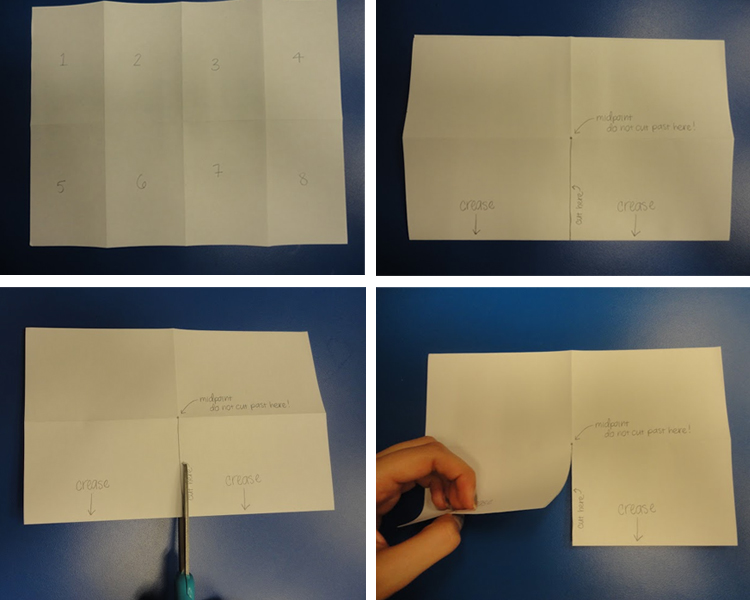
Step 3: Now, exactly as you did in Step 1, fold your paper hamburger style. With the folded edge facing you, cut along the crease that divides the paper in half (with the help of an adult!), stopping at the midpoint where the other crease is. You will have cut halfway up the piece of paper starting from the folded edge.
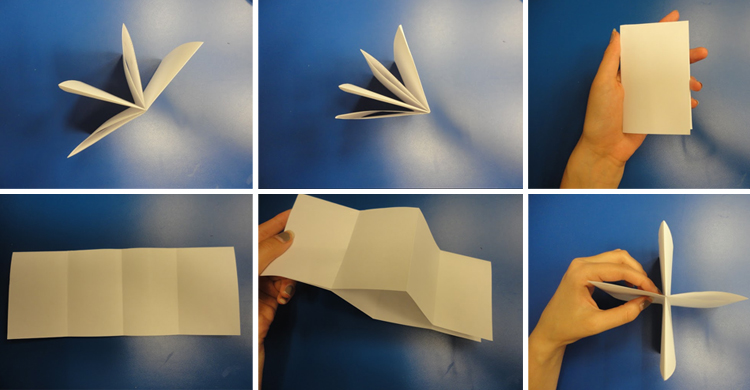
Step 4: Unfold the paper again and, like you did in Step 2, fold it hotdog style. Carefully holding onto each edge of the paper, push it together until the cutout middle section has formed a diamond shape. Continue pushing until it looks like a plus sign and then keep pushing until you form your eight-page booklet! In later steps, when you have drawn on each of these pages, you will be able to unfold your booklet and have eight drawings each in their separate square.
Step 5: Draw people, buildings, animals, or plants that you see around your neighborhood that will help you tell your story. With an adult, you can take your sketchbook outside and go for a walk to see all of the different things that make your neighborhood unique. Step 6: When you have enough drawings to tell your story, unfold your booklet and lay it flat on a table (or, if you chose option 1 and didn’t make a booklet, just lay your piece of paper flat on the table) and cut out each of your drawings. You may want to ask an adult to help you out with this step.
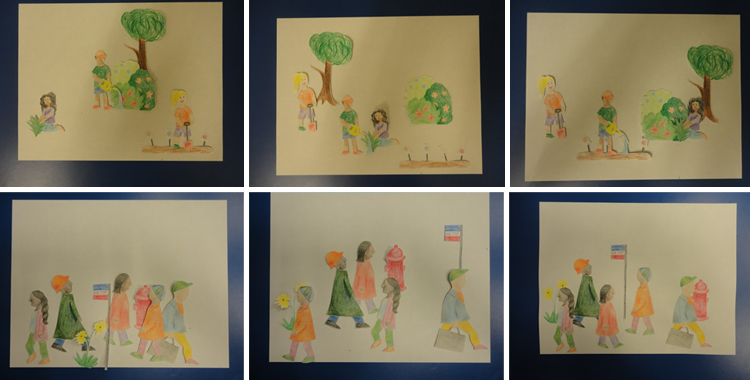
Step 7: Arrange the people, animals, and objects that you’ve drawn on a new piece of paper. Think about the way you are arranging them. Try to make some drawings look like they are in front of or behind others. Try as many different compositions as you’d like, and remember to think about which compositions will best tell the story you want to tell.
Step 8: When you’ve found the composition that you like best, glue down each of your drawings and add a background. Come up with a one-sentence caption for your artwork.
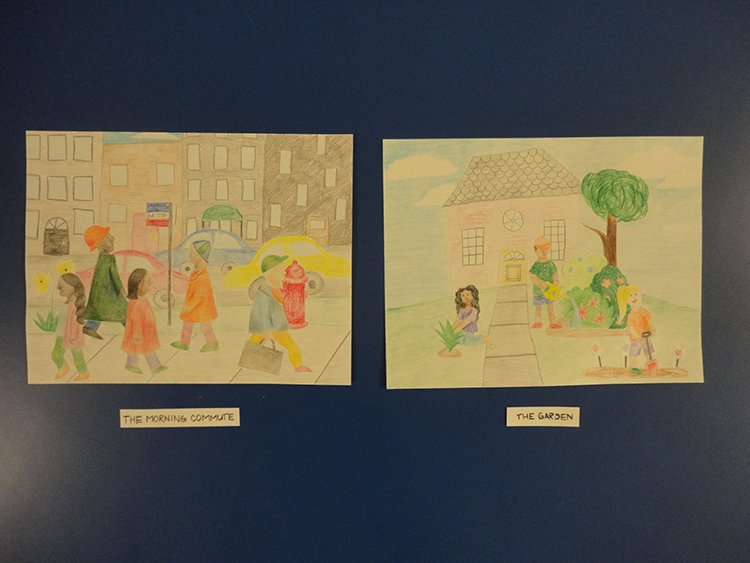
Step 9: Repeat these 10 steps to make as many different panels as your story needs! It might need 3, and it might need 12; it’s entirely up to you. Share your creation with family and friends; what stories do they see in your artwork?
